Tell your friends

Wednesday, March 31, 2010

CHECK THESE GUYS OUT: Hipgnosis


Hipgnosis was a Brisitsh art desgin group that originated around 1968. It all began when Thorgerson and Powell were approached by their friends in Pink Floyd to design the cover for the group's second album, A Saucerful of Secrets.
At the time, Thorgerson and Powell were art  and film students studying  at Royal College of Art. They took advantage of this and used the darkroom. When they graduated they moved their little studio into Powell's bathroom. Eventually they rented space to build a studio in early 1970.

 When first starting out, Powell and Thorgerson adopted their name from graffiti they found on the door to their apartment. Thorgerson said they liked the word, not only for sounding like "hypnosis," but for possessing "a nice sense of contradiction, of an impossible co-existence, from Hip = new and groove, and gnostic, relating to ancient learning."

Here are some more covers that the magic duo did,

SYD BARETT


PINK FLOYD


PRETTY THINGS


LED ZEPPELIN:


TREX:


You can read more and see the full list of albums here.


Tuesday, March 30, 2010

This is how I feel about college,

Hannah Plummer

Hannah Plummer, oh what a doll! I always seem to use her as my subject matter for my pieces. Her natural beauty is so appealing. She is also a mean cook and knitter.
BORN TO BE BAD.

I did these prints of her a few months ago. Both won Reginal Gold Keys, Hannah Plummer I (Gold Key in print making) and Hannah Plummer II (Gold Key in Art Portfolio).


Hannah Plummer I, 3" x 5"


Hannah Plummer II, 3" x 5"


The only difference between these two prints is the color. I went back on this on and added water color. I also built up the texture of ink, which made it more quirky and characterized. I absolutely love the gums and teeth of these prints. Naturally, she has ridged teeth, but I find this quality interesting.
She had braces for a total of four years, and she even wears her retainer every night unlike some of us ex-brace faces.

What a fabulous person


Monday, March 29, 2010

Sally Sells Sea Shells By The Sea Shore


I found a $12 tin box at the flea market this weekend and bid it down to $7.50. What a steal! It's awesome, now I have something I can but all of my letters and/or library cards in.


SEA OF VANDAL, LOST MY CANDLE, LOST MY HANDLE

Dee Steine

 
Alright, enough is enough. I'm going to stop paintings girls for awhile and switch it up a little.
In the next week or two, I'm going to do a portrait of David Steine, otherwise known as DeeDee.

If you don't know Dee already, he is in a local Nashville band So Jazzy and writes for the blog NASHVILLE'S DEAD. I must admit I have a secret crush on this blog, you should definitely check it out!

Something seems familiar... David and I also realized that both of his eyes tend to look in opposite directions...Something is definitely going on.


Sunday, March 28, 2010

Natalee McCarthney

I just recently finished a painting of my dear friend Natalee McCarthney. I think this piece turned out incredible! Even though it's only library-card size, it took me about a week to finish everything.
I think the line quality and hints of blue shading under the eyes looks awesome.

Natalala is a lot cuter in person though.


Natalee, "3 x 5"

Do It Yourself Silk screening


ok, so at some point in owr boring lives we have wished to learn the old art of silk screen- printing. for those of you whom are not familiar with silk-printing,
silk screen-printing is a printing technique that uses a woven mesh to support an ink-blocking stencil. The attached stencil forms open areas of mesh that transfer ink as a sharp-edged image onto a substrate. A roller or squeegee is moved across the screen stencil, forcing or pumping ink past the threads of the woven mesh in the open areas.
Screen printing is also a stencil method of print making in which a design is imposed on a screen of silk or other fine mesh, with blank areas coated with an impermeable substance, and ink is forced through the mesh onto the printing surface. It is also known as "silk screening" or "serigraphy".
(credits to wikipedia)

however, i am going to tech you a cheap/ some what easy wasy to do your very own screen print without having to actually buy a screen, photo emulsion, screen filler, squeegee, etc.

here are the supplies you will need:

- Mod Podge (regular glue will not work)
- an embroidery hoop
- paint brushes (no necessarily new)
- acrylic/fabric paint
- nylon (pantie hoes; they can be old or used)
- a sharpie (or dark colored marker)
- something to print on
- blow dryer (optional)

all of these items can be purchased at Michael's (except the nylon pantie hoes)


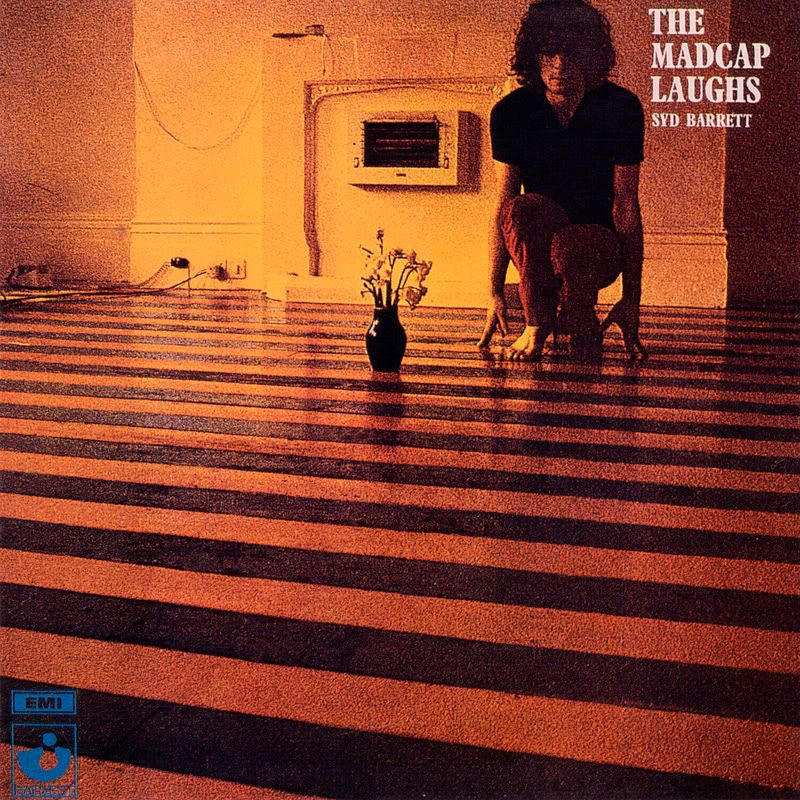
1. find an image you wish to print. the image you choose must black and white so it is easy to copy onto the nylon.


open your image to the program Paint (every Microsoft computer has it)
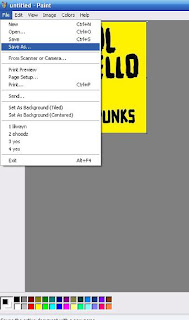

go to file and scroll down to save as


then go to the save as type (left to the cancel button) and scroll to the top option Monochrome Bitmap (*.bmp,*.dib)

your image will automatically turn black and white.
print your image onto white paper


tip: you should try to pick a simple image, keep in mind that the black part of the image will be where the paint goes.


2. take your nylon pantie hoes and cut of the top fabric (right were the legs begin) you will then stretch it entirely across the embroidery hoop.


3. place your image under the screen, make sure you have the screen FACING DOWN. this is very important because if you do not have the screen facing down then your image will turn out backwards.


4. Take a sharpie (or dark marker) and color in were you want the paint to go (a.k.a the black) Once you are finished with that, you can remove the image from under the screen.


5. Now start painting in the mod podge in the negative space (a.k.a all of the white area). make sure you flip the screen over for this process; you should also make sure to cover up any areas that you don't want the paint to bleed through. when you are done, let it dry for about and hour. to speed up the process you can use a blow dryer.


6. YOU ARE READY TO PRINT! turn your screen over, then try to completely cover the image with your paint. place the screen above your desired form of material, take a somewhat large brush and then press on your image.
you're going have to experiment and see what works. when you figure out what works, you can make as many prints as you want!


7. if you wish to print in other colors, make sure you rinse of the paint. don't worry, the mod podge will not wash off. if you remove the nylon from the hoop, it will shrink and be hard to re-stretch, so make sure you are done printing that image when you remove the nylon.


good luck, if you have any questions about anything let me know!

SCORE! Maybe not

I received a package from The Scholastic Art and Writing Awards on Thursday. Inside, it said that one of my pieces, Almost a Woman, is on its way to New York to be displayed at Carnegie Hall!
WHAT?


Almost A Woman, 3"x 5"


Along with that, I recieved a National Silver Key for,
-Art Portfolio
-Hannah Plummer print
-Self-portrait print


Hannah Plummer II, 3" x 5"


Self-portrait, (about) 27" x 32"


After all this excitement, I called up SAIC to see if I could receive any additional scholarship money for my National wins.
None. Zero. Zip. Nada. Go home kid.
WHAT?

I am tried of being optimistic and getting my hopes up. In reality, I knew my family could not afford to send me there, but I kept telling myself that the school would help me out. The merit Scholarship is good, but I will be about $36,000 in debt before i turn 21. And that's just from my first year.


Friday, March 5, 2010

"Goat Head" print


Goat-head I

Goat-head II

I made these in the winter of 2009. The original prints are black and white, but I decided to paint one with watercolor and coffee (Goat-head II). The watercolored one took me at least one week to finish, but it was worth it.

both are about 24" x 20"

Goat-head II won a gold key in the Scholastic Art Awards of 2010.

Scholastic Art Awards 2010. Shown at Cheekwood in Nashville, TN


Making the Goat-Heads